Tuesday, February 28, 2017

Playful Carousel Hexagon Box

Happy Tuesday!  Today I have a project to share with you that I created for my most recent swap with my friend Marlene!  After seeing photos of this gorgeous box by Claire Napper on Pinterest, I wanted to find a way to create my own!  It took some research into how to create hexagon boxes with this style of top (came across some other cool origami ideas along the way that I'd still like to try, too . . .).  But, I did it!  Here's how my version turned out:


I used So Saffron for my base, and stamped the circles on the top using the Playful Backgrounds stamp set and Peekaboo Peach ink.  For the side panels, I placed a piece of the Cupcakes & Carousels Designer Series Paper onto a layer of Peekaboo Peach card stock.  For the carousel horse, I stamped the image from the Carousel Birthday stamp set in Bermuda Bay ink, colored carefully with the Watercolor Pencils, then went over the coloring with either Clear or Gold Wink of Stella, before fussy cutting the image.


Here's a view of the top, which is held closed with a bit of Bermuda Bay Baker's twine.


A fun box to fill with candy and send off to a friend!  It would also be an amazing party favor, don't you think?!  

Please let me know if you'd be interested in learning how to make this box!

Thanks for visiting!
Michelle

Wednesday, February 22, 2017

Sweet Succulent Garden for a Friend

Today's project is one of the 3D items I created for a recent swap with my friend Marlene.  I wanted to make a miniature terrarium filled with some always blooming succulents, made with the Oh So Succulent Bundle!   The "Friend" tag is created with the Layering Circle Framelits and the new Make a Medallion stamp set (available for FREE with a $50 order as part of the Sale-a-Bration second release). 


The tag also has a heart from the Subtles Enamel Shapes on it.  The bow around the top of the terrarium is Sweet Sugarplum Ruched Ribbon


I found the dome in the miniature display section of a certain big-box craft store, and created the base for it using the Layering Circle Framelits (though had to trace around the largest scallop and fussy cut to get the exact size I wanted).  In the photos below, you can see that I lined the inside of the terrarium with a circle cut from the Succulent Garden Designer Series Paper.  I also tied a bit of Linen Thread around the base.


Colors used for these succulents were Pear Pizzazz, Pool Party, Wisteria Wonder, Mint Macaron, Cucumber Crush, and Emerald Envy.  The large flower centers are circles from the Subtles Enamel Shapes.

If you'd like to create some Succulent Gardens of your own, you can purchase the  Oh So Succulent Bundle and other supplies in my online store here.  (And, even better, from now through March 31, 2017, for every $50 you spend (not including tax and shipping) you can earn a FREE Sale-a-Bration item like the Make a Medallion set!).

Thanks so much for visiting my blog!

- Michelle

Tuesday, February 21, 2017

Special Reason Birthday Card with Sale-a-Bration Second Release Glimmer Paper!

Happy Tuesday!  Big news today is that the Sale-a-Bration second release items are now available!  You can see what's included in it by clicking here.  

My favorite item from the second release is the beautiful glimmer paper, and I used it, along with the Special Reason Bundle, to create this birthday card: 


Supplies used:

Stamps:  Special Reason Stamp set (part of Special Reason Bundle)
Ink:  Emerald Envy, Sweet Sugarplum
Paper:  Mint Macaron, Emerald Envy, and Whisper White Card Stock 
Accessories:  Stylish Stems Framelits (part of Special Reason Bundle), Sale-a-Bration Glimmer Paper Assortment (Sweet Sugarplum used), Rhinestone Jewels, Sweet Sugarplum Ruched Ribbon

Receive your Glimmer Paper Assortment (or other Sale-a-Bration choice) FREE with a $50 order!  For more information about Sale-a-Bration, or to shop my online store, please click here.

Thanks so much for visiting my blog!

- Michelle

Monday, February 20, 2017

Sale-a-Bration Pretty Pocket Card Kit

Happy Monday!  It's raining buckets here! The boys and I decided to brave the rain and hike at one of our favorite local parks, and we were rewarded with getting to see lots of natural beauty and wildlife including 3 deer and more than 30 turkeys (all in one spot!)  


We also managed to get thoroughly soaked.  We were very grateful to be able to come home to a warm house and change into clean, dry clothes.  And, I'm looking forward to a bit of time to get some stamping done, especially since I have a couple of card swaps to finish.  However, before I get to that, wanted to pop in here and share some cards!

These are some bright, happy cards I created using the Pretty Pocket Card Kit, which is an exclusive Sale-a-Bration item (3 more of those are coming very soon, too -- stay tuned for more info about that)!  When I created the card kit, it was so fun and easy, I decided to just make the cards following the instructions.  Here are how mine turned out:


I've seen lots of cute alternates with this kit on Pinterest as well, and especially love how the kit coordinates with the Swirly Bird set from the 2016-17 annual catalog -- here's a link to a beautiful example of that.

Friday, February 17, 2017

Fabulous Friends Friday: Jane's Double Window Box Luminary

Happy Friday!  Today I have a fabulous project to share with you created by my very talented friend Jane!  She figured out a way to make a double-size box with the Window Box Thinlits die, with some very careful cutting, and created this gorgeous luminary (that's a battery-operated tea light inside, not a real flame!)  ;)


I have seen tutorials from Kirsteen Gill on how to make a box like this (and even larger), and have given it a try as well . . . stay tuned to see my creations!

Thanks to Jane for this beautiful luminary that has brightened my days -- hope it has yours as well!  Thanks so much for visiting my blog!

- Michelle


Thursday, February 16, 2017

A Belated Valentine's Treat Post!

Hi, everyone!  Happy Belated Valentine's Day!!  Sorry to be quiet for a couple weeks there!!!  Life has been incredibly busy, but good.  I have lots of projects to share with you -- including some from another recent swap with my friend Marlene!  In fact, the project I have to share with you today is a project I created for that swap.  I found this fun bag of English Butter Fudge at a local grocery store, and decided to create a "belly band" and matching tag to go with it for Marlene.  Here's how that turned out:


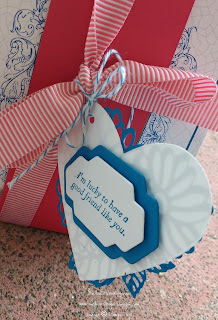
A little hard to tell from the photos, but that's a strip of Watermelon Wonder wrapped around the box, and some of the yummy Watermelon Wonder Striped Ribbon tied around that.  For the tag, I started with a heart cut with the Sweet & Sassy Framelits, then added some flowers and leaves cut with the Stylish Stems Framelits Dies out of Pacific Point card stock, to match the design on the packaging.  I also used those dies and the coordinating Special Reason stamp set (available in a bundle and save 10% with the dies!) to add the greeting element to the back. I love the versatility of the Special Reason bundle!!!

Thanks so much for visiting my blog!

- Michelle


Saturday, February 4, 2017

Valentine's Sampler with SUper Friends Artwork

Hi!  Happy Saturday!  Quick post today to show you what I did with the amazing swaps I received from my talented SUper Friends!

I decided to use a sheet of Flirty Flamingo Envelope Paper as the background.  Here it is before framing:


And, in the frame:


As I'm looking at the photos, I'm thinking maybe I should switch the carousel horse piece with the heart piece below it.  What do you think?  Please leave me a comment and let me know!

Thanks for visiting my blog!

- Michelle

Friday, February 3, 2017

Fabulous Friends Friday: January SUper Friends Swaps!

Happy Friday!!!  Hope you are having a fabulous day!!!  I've been having a busy week, but a great one -- especially because it started with time spent with my SUper Friends demonstrator group!!!  We had a great time catching up, talking about the great new Sale-a-Bration and Occasions projects, doing a little card assembly, sharing some yummy treats, and swapping! Actually, we did not one but two swaps!!  And, I have both of those to share with you today!  Since there are so many pictures to enjoy, I'll keep my commentary (from here on out!) pretty brief!  ;)

One of our swaps was a 3 x 3" swap to create a Valentine's sampler.

Connie used the Lift Me Up Bundle to create her sweet 3 x 3":


Jana used the Sealed with Love Bundle to create these two flirty pieces (the "love you lots" note in the envelope in the first one actually comes out!  So cute!)

Margery also created two beautiful pieces, which show off the lovely lace doilies from the Occasions Catalog.  The first one uses the Love Notes Framelits dies and "love" from the Sunshine Wishes Thinlits.  The second one has a lovely kaleidoscope-like flowered heart.


Judy-Ann created this fun, heart-filled shaker card with the Sunshine Wishes Thinlits and Layering Squares Framelits:


Nancy used lots of little hearts from the Confetti Heart Border Punch, the Happy Heart Textured Impressions Embossing Folder, and the Blooms & Bliss Paper for her fabulous artwork:


Agnes's elegant piece features a heart from the Sunshine Wishes Thinlits, cut out of Red Glimmer Paper, and with a bit of the Falling in Love Designer Series Paper in the background:


My card has the horse from Carousel Birthday, colored with the new Watercolor Pencils and Wink of Stella, then fussy cut, with the ferris wheel in the background stamped with bleach on Real Red (I colored the cupcake icing with a white watercolor pencil).  Ribbon is from the Cupcakes & Carousels Embellishment kit, and the little hearts in the corners are from the Any Occasion Sale-a-Bration set:


Whew!  That was our first swap.  Tomorrow, I'll show you how I put all those pieces together into a framed sampler.  Our second swap was of cards made with new items from the Occasions and Sale-a-Bration Catalogs.

Connie created this darling card using the Moon Baby Stamp set, clouds from the Lift Me Up Bundle, and Sale-a-Bration ribbon:

This adorable card is Margery's creation, featuring a couple images from the Little Cuties stamp set, along with Delicate Details from Sale-a-Bration, the lovely lace doilies from the Occasions Catalog, and the Hexagons Dynamic Textured Impressions Embossing Folder:


Jana's glorious creation features some very intricate piecing work done with the That's the Tag Bundle and the Sunburst Thinlits Die:


For her lovely creation, Judy-Ann did a combination of watercoloring and paper piecing with an image from the Beautiful You stamp set:


Agnes's dreamy card features a bokeh background from the Falling in Love Designer Series Paper with stamping and die cut dragonfly from the Dragonfly Dreams Bundle:


 For her chic card, Nancy paired greetings from the So Very Much Sale-a-Bration set with a bit of metallic pizzazz from the Affectionately Yours Designer Series Washi Tape:


I couldn't resist creating a "SUper Friends" card using the Everyday Hero stamp set and some watercoloring with the new Watercolor Pencils:


Thanks for staying with me through this long post!!!  Hope you enjoyed our creations, and we've inspired you to do some stamping this weekend!

- Michelle