Friday, January 28, 2011

Ice Cream Parlor For You Card

Here's another card I made using the Ice Cream Parlor Designer Paper and Accents Pack from Sale-a-Bration (this is one of the products you can choose for free for each $50 in Stampin' Up! merchandise you order during Sale-a-Bration!)


I also used the Punch Bunch Sale-a-Bration stamp set (another of the choices!) for the image in the flower center and for the true friend greeting beneath the Old Olive Satin Ribbon bow. 

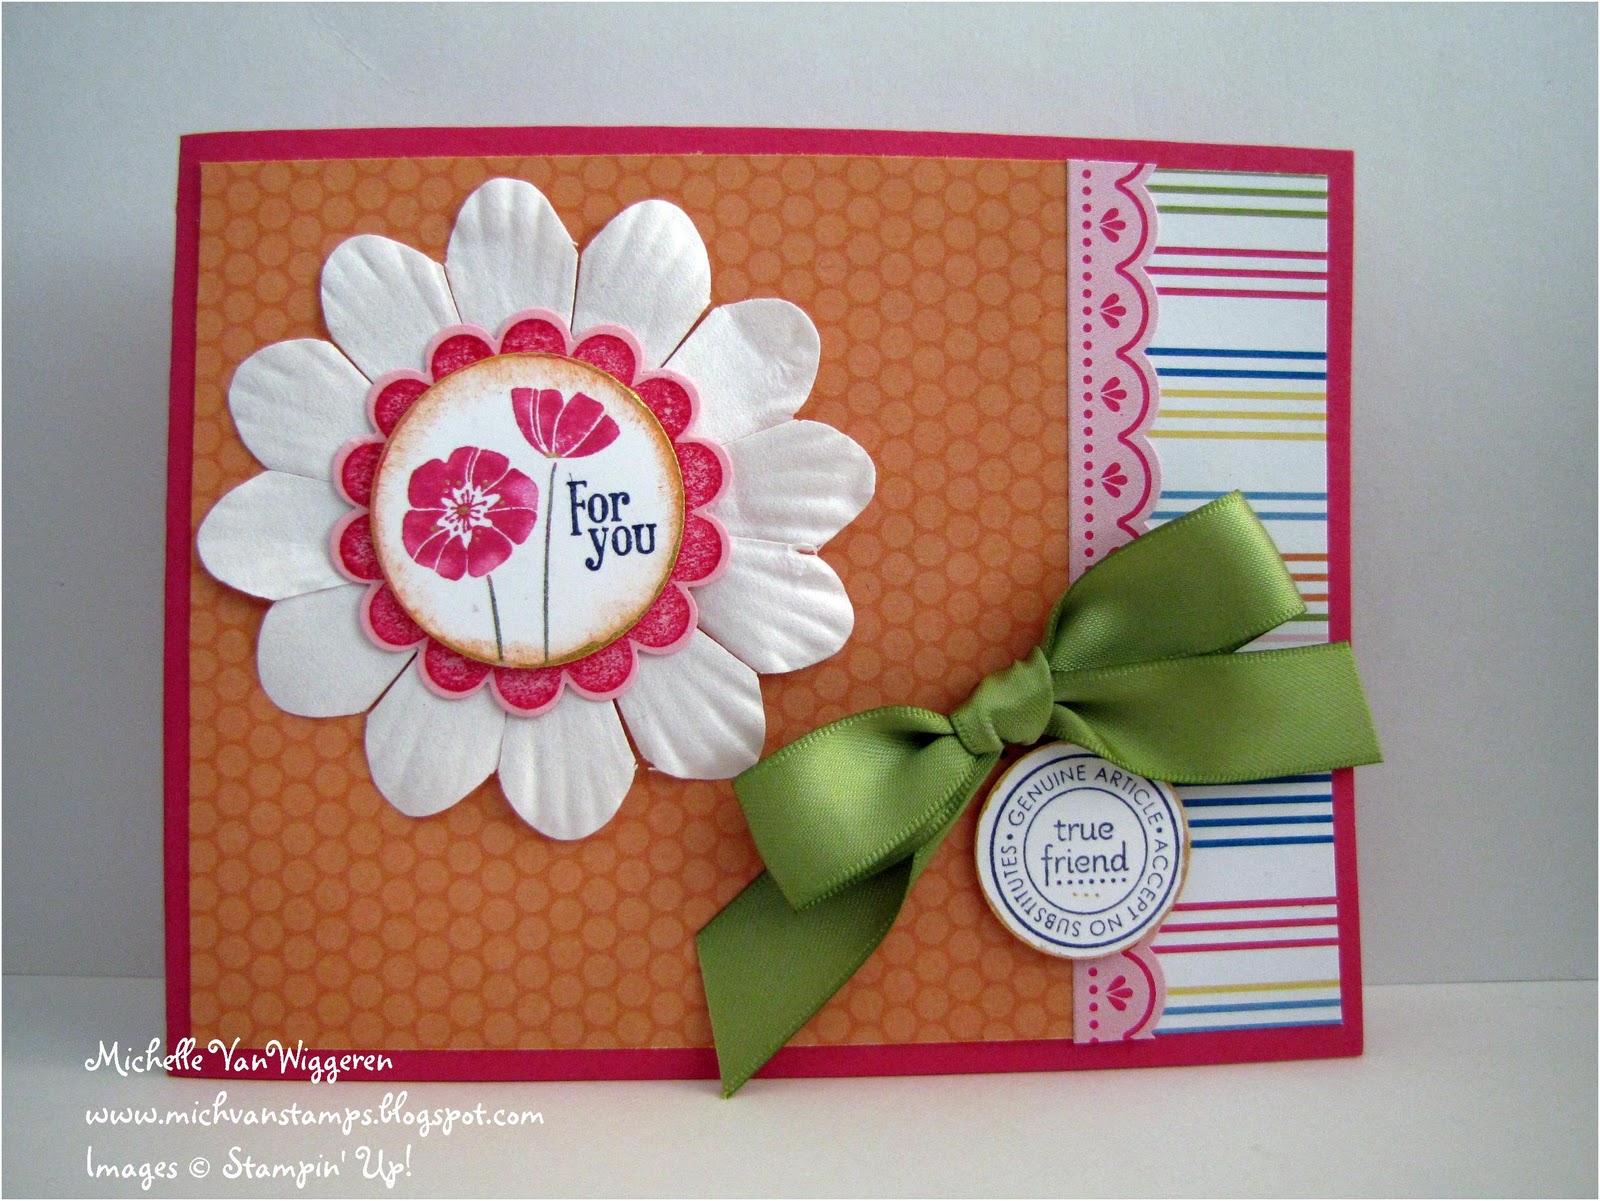
Here's a close up of the flower:


The flower is one of the large Paper Daisies.  I stamped a piece of Pretty in Pink card stock with the "For You" image in Melon Mambo Classic Ink, then punched that out with the Scallop Circle Punch. 

Then, I stamped the image again on Whisper White, this time coloring the flower petals with Melon Mambo (I used my ink pad, but a marker would have been easier!), the stems with Old Olive, and the words with Night of Navy.  I punched this out with a circle punch, and sponged around the edges first with Pumpkin Pie ink, and then went around the edge of the circle again with Gold Smooch.

Similarly, for the true friend tag, after stamping the image with Night of Navy and punching it out, I went around the outside of the circle with Gold Smooch.


I finished the inside of this one, too -- rather simply, just added a piece of Whisper White card stock, a strip of the designer series paper, and one of the accents.  Then, I used the Gold Smooch to add some dots to the center of the flowers on the designer series paper:


Hope you like this card!  Thanks for stopping by!

- Michelle

Thursday, January 27, 2011

Pennant Amour Valentine Card

Pennants and card with pennants on them sure are popular right now -- and they are so fun, I guess that's why!  One of my fellow Late Night Stampers, Melany Watson, posted a wonderful idea that puts a new spin on the Take a Spin stamp set from the Occasions Mini Catalog; rather than making a spinner with the stamped image, she cut it apart and created a pennant!  You can see Melany's card here.

Melany's card inspired me to create my own pennant card, but I wanted to create a vintage-y Valentine with the set (and this is another of the cards for my Vintage Valentine's class coming up tomorrow, January 28th).  Here's my creation:


The Happy Happy Valentine's pennants are from the Take a Spin set and were stamped in Basic Black on Very Vanilla cardstock.  The lined designer paper is from the Love Letter Designer Series Paper Pack, and was die cut using the Top Note Die and the Big Shot.  I stamped on it with Basic Black Craft Ink and the filigree image from the Artistic Etchings stamp set. 

The Riding Hood Red card stock in the background was stamped with the Language of Love wheel from the Occasions Mini catalog. 

The ribbon for the pennants is a length of the Victoria Crochet Trim and the Basic Black 1/8" Taffeta Ribbon, knotted together at regular intervals.

The "Amour" heart is a piece of Pink Pirouette Textured cardstock, that I stamped with the heart image from the Level 1 Hostess Set Punch Potpourri using Riding Hood Red Classic Ink, and then the Amour image from the Artistic Etchings stamp set using Basic Black Craft Ink.  The heart was punched out using the Full Heart Extra Large Punch, which coordinates perfectly with the image from Punch Potpourri!  Here's a close up:


I added a smaller Pink Pirouette heart, punched out using the Heart to Heart Punch.  Plus, I punched hearts out of the new red Glimmer Paper, also from the Occasions Mini. 

And, I couldn't resist adding one of the Vintage Flower Adornments -- I inked this one up a bit with just a hint of Basic Black Craft Ink to give it an aged look. 

The chunky black glitter around the Top Note and heart is from the Chunky Essentials Glitter Pack.

I finished the inside of the card as well.  Here's how it turned out:


Hope you enjoyed this!  Thanks for stopping by!

- Michelle


Tuesday, January 25, 2011

Time to Sale-a-Brate!!!

Today's the first day of Sale-a-Bration!!!  Sale-a-Bration is so much fun!  How can you not love receiving free goodies from Stampin' Up! ?!  (For those who aren't familiar with Sale-a-Bration, this is a special promotion that Stampin' Up! runs once a year -- this year from today through March 31, 2011-- where you can pick a free product from the Sale-a-Bration catalog for each $50 in merchandise you order!)

So, I thought I'd share a sneak peek with you of a card I am working on right now with one of the free gifts you can choose -- the Ice Cream Parlor Designer Series Paper and Quick Accents Pack.  Here is the peek:


This shows three of the 6 paper designs from the package and the flowers and blue trim are Quick Accents from the pack.  I'll have more photos and information to share with you about this card sometime next week . . . after the person I'm making it for has received it! 

Thanks for stopping by!  And, if you'd like more information about Sale-a-Bration or to do some shopping, please click here.

- Michelle

Friday, January 21, 2011

Springtime Vintage Valentine

Today I have a card to share with you that is from a recent swap I did with my friend Marlene -- featuring fun new products from the Occasions Mini Catalog. 

This card will also be one of the cards at my upcoming Vintage-y Valentine's Class on Friday, Jan. 28th.  If you are in the Bay Area and would like to come, I still have a couple spots left, please leave a comment or send me an email!

So, without further ado, here's the card (with apologies for the photo, since the colors in it are close but not quite right . . . not sure what happened there . . . ):


The card base is Sahara Sand, and the front was embossed using the new Framed Tulips Textured Impressions Embossing Folder.  I sponged Frost White Shimmer Paint around the frame, so that is why it has a bit of a glow in the picture (and even more shimmer in real life).  A piece of Rose Red cardstock is layered on top of the frame.

To create the heart I used the Hearts & Brackets Originals Die with the Big Shot, and cut out a piece of the gorgeous new Springtime Vintage Designer Fabric.  The scallops behind it are buttons from the new Button, Button stamp set, which I stamped on Pear Pizzazz cardstock using Always Artichoke Classic Ink, and then punched out and adhered. 

When I was creating this card, I actually had something else in mind for the heart . . . I had pictured buttons on top of and framing the heart, but as I was playing around with pieces I had punched out, this idea came to me instead.  I still want to make my other idea work -- when I get it figured out, I will be sure to show you!

I added a Vintage Flower Adornment on top of another stamped button. 

The ribbon is Pear Pizzazz 1/2" Stitched-Poly Ribbon.  The little tag is a piece of Very Vanilla which was stamped with "love" from the Fabulous Phrases set, and tied onto the Pear Pizzazz ribbon with a piece of linen thread. 

Thanks for stopping by!

- Michelle

Wednesday, January 19, 2011

Completed Valentine's Kusudama Wreath!

I did it!  Here's the finished wreath:


The total number of flowers on this wreath is 62.  The flowers were created using approximately one and a half packs of the Love Patterns Designer Series Paper Pack from the Filled with Love promotion, which ends January 24th!  So, if you haven't purchased yours for your Valentine's projects, you may want to head over to the online store and do that right away!

In addition to the designer series paper, I used almost an entire package of Clear Rhinestone brads, Tombo Mono adhesive (awesome stuff!), a foam wreath base, a glue gun to attach the flowers to the base, and Very Vanilla Satin Ribbon for the hanger.

If you would like to see my work in progress posts for this wreath, you can here and here.  And for instructions about making this type of flower, please be sure to visit this site.

Thanks for stopping by!

- Michelle

Tuesday, January 18, 2011

Valentine's Kusudama Wreath . . . Continued Work in Progress

Well, I was able to make some great progress over the long weekend on my Valentine's Kusudama wreath.  I even took a few photos to show you how it is filling in.  Here is the wreath after adding another batch of flowers: 


You can see that I've added some clear rhinestones to the flowers' centers.  And, here's the next batch of flowers waiting to be hot glued to the wreath:


I finished the wreath yesterday, and just need to take some photos to show you the final project!  Stay tuned!!

Thanks for stopping by!

- Michelle

Wednesday, January 12, 2011

My Digital Studio -- January calendar page and new blog header!

Back in December in this post, I gave you a sneak peek of a calendar project I was creating in My Digital Studio, using the 2011 Noteable Desktop Calendar Download.  Well, I have another page to show you from that today -- my January page:


This is the top page, there is also a coordinating calendar grid page, which you can customize and add notes about birthdays, anniversaries, etc....

The designer "papers" in this digital calendar kit are very beautiful -- and I love how this one works for a masculine page, but still has a soft, vintage-y feel.   I actually also was able to make a landscape 8.5 x 11" version of this page for a larger calendar, so the designer paper also works well for other sizes and would even work well for cards and other projects!  Very versatile!  

The photo I chose is Daniel with his pinewood derby car last year -- hard to see in the page, but the car actually has light-up headlights -- something Daniel and his dad worked hard to make possible!  And, have done again this year.  Daniel and his dad are still putting the final touches on this year's car.  I will try to get some photos of it at the race this weekend.

In case you hadn't noticed (especially if you are reading the feed of this on Facebook or my Stampin' Up! website, I also wanted to show you my new blog header.  I used the new Sweet Stitches Designer Series Paper download, from the Occasions 2011 Mini Catalog to create it.  Here it is:


I added pearls from the Basic Pearls and Rhinestones Digital Download to the flower centers. 

There are a lot of other great new digital downloads that you can see in my online store -- be sure to check them all out!  And, while they work beautifully with My Digital Studio, the downloads can be used with other programs as well.  Please leave a comment or email me if you'd like more information!

Thanks for stopping by!

- Michelle

Tuesday, January 11, 2011

Happy New Year!!! I'm back . . . finally!!!

Hi, everyone!  Happy New Year!!  Hope 2011 is off to a great start for you!

Apologies for neglecting the blog for so long!  . . . We had a wonderful visit with my parents over Christmas and then ended up taking a quick trip to Yosemite to see its amazing beauty in the snow (or more importantly according to my little guys-- to play in the snow!)  I'll try to share some of our photos from there soon.  And, well, last week it was all I could do to just get everyone back into our usual routine.  So, now, at last, this week things are settling down enough that I have had a few moments to stamp and now to blog!  Yeah!!

I have also made a rough start on my Valentine's Kusudama Wreath . . . I have some of the biggest flowers for it assembled and hot glued to the wreath form.  I'm afraid this doesn't really look so beautiful yet, and I might need to rearrange the flowers a little (not sure if I like the big clump in the upper right corner), but so you can see how the creative process goes, here's a peek at what I've done so far: 


Just for fun, here's a close up of some of the flowers:


These flowers are made with the Love Patterns paper pack -- available as part of Stampin' Up!'s Filled with Love Promotion (which goes until Jan. 24th).  I'm planning to glue clear rhinestone brads in the flower centers . . . also considered the pink or red circle rhinestone brads from the Fire Circle set.  That would be pretty, too.

I'm actually working on some cards with products from the Occasions Mini right now for a swap, and will show you those after they are safely in the hands of my fellow swapper.  Don't want to spoil any surprises!  :)

And, tomorrow, I'll share with you a page from one of my most recent My Digital Studio creations.  Stay tuned . . .

Thanks for stopping by!

Michelle

P.S.  If you'd like to order your own Love Patterns pack -- or shop for any other projects, please be sure to click here to visit my online store.