Thursday, January 29, 2015

Love Life!

Hi everyone!  This card seemed like a good one for today.  :)  I love that the Sale-a-Bration A Happy Thing Stamp Set has both a lemon in it and the "love life" sentiment.  I'm blessed to have a lemon tree right outside my front door, and honestly, don't use as many lemons as I should (probably give away more than I use!), but when I do, one of my favorite things to do is to make lemonade . . . which reminds me of the old saying, "when life gives you lemons, make lemonade . . ."  Inspired by thinking about that, I created this cheery card:


The tags are cut using dies from the Curvy Keepsake Box Thinlits.  The frame around the image is die cut and embossed using the largest die from the On Film Framelits.  I used Daffodil Delight and Old Olive Blendabilities to color the lemon image.  The bright, cheery designer paper both in the background and on the leafy tag is from the Sale-a-Bration Best Year Ever Designer Series Paper.  I used Daffodil Delight Ribbon from the Best Year Ever Accessory Pack as an accent on the designer series paper, and the bow holding the tags together is Crushed Curry Baker's Twine.

Hope this card brightens your day! 

Thanks so much for visiting!

- Michelle

Wednesday, January 28, 2015

Hooray It's Your Day (Open House Samples)

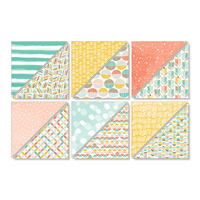
Hi!  This past Sunday, I held my Occasions and Sale-a-Bration open house, and I had a wonderful time with the ladies who came!  Sorry if you missed it . . . but at least I can show you the samples for the make and take!   We created cards from the Hooray It's Your Day kit from the Occasions catalog.  Such a fun kit! 

I think one of my favorite things about the kit is that it comes with two stencils that you can use on the cards (and on other projects, long after you've managed to use up the supplies in the kit!)  We were using the stencils with spritzing, which is a little harder than you might expect . . . only because it is important not to get too much liquid on your cardstock, but can be challenging to know when you've reached or gone past that point!  Just requires a little bit of experimenting and practice, but that can also be fun, right?!  Anyway, on to the samples!!

For the first two cards, I used the sunburst-style stencil, and spritzed on a solution of Daffodil Delight ink refill, rubbing (isopropyl) alcohol, and a little bit of leftover Gold Foil Smooch Spritz (adds some subtle shimmer and almost a glow to the rays):


My Hooray It's Your Day stamp set had not arrived yet, so I improvised with the "you're the best" sentiment from the Sale-a-Bration Simply Wonderful set and the "Celebrate!" from Celebrate Today (which actually is designed to coordinate with the Hooray It's Your Day kit and stamp set as well).

For the next two cards, I used the scallop stencil and spritzed a solution of Pistachio Pudding and alcohol:


The "to a great friend" is from Simply Wonderful and "birthday girl" is from 
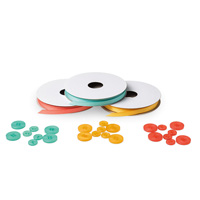
Endless Birthday Wishes.  The flowers came Whisper White as part of the kit and were spritzed with the Daffodil Delight solution.  I also added some Melon Mambo candy dots to the flower centers.

For the file folder card from the kit, I decided to try sponging Daffodil Delight ink instead of spritzing.  Here's how that turned out:


The "happy" and "birthday" sentiments are from Endless Birthday Wishes and are stamped in Bermuda Bay ink.

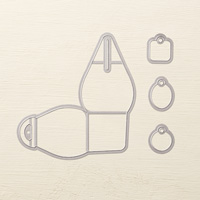
And, last but not least, for the gift card holder card, I spritzed a bit of Daffodil Delight on most of the card, and some Pistachio Pudding solution on just the left side:


 On the tag, I used images from the Sale-a-Bration Best Day Ever set, stamped in Melon Mambo and Bermuda Bay. 

I'm looking forward to creating more of these cards!  

Which one is your favorite? 

Thanks so much for visiting!

- Michelle

Friday, January 23, 2015

Paper Pumpkin Fun!

I had fun this week starting to assemble the January Paper Pumpkin kit, "Filled with Love."  (If you haven't gotten one, and want to see what's in it, Stampin' Up!'s video about it is here).  I've made about half of the kit, just following the directions as shown so far . . . the rest I plan to make cards my own way.  I've seen some great inspiration on Pinterest (want to see it, too?  Please click here to visit my board for this kit).  I'll be sure to share photos of my projects soon.

In the meantime, I can show you some of the cards I made with the December kit:


Really love these!  No fancy variations on this kit yet, but did get a refill kit for it so I could do that.  Just need more hours in the day!!!  

If you'd like to join in on the Paper Pumpkin fun, be sure to click here to learn more or sign up!  There's also a great special on Paper Pumpkin prepaid subscriptions right now . . . you can save $5 on a 3 month prepaid subscription, plus qualify for a free Sale-a-Bration item!  If you'd like to take advantage of that, please click here to go to my online store!  

Hope you have a great weekend.

Thanks for visiting!

- Michelle
  

Saturday, January 17, 2015

Hello Life Project Kit . .. Done!

If you read my blog regularly, you might remember that I was waiting on some photos to come before I put together my Hello Life Project Kit.  Well, guess what?!  They came!  And, I love how fun and easy it was to assemble this kit!  Here's how my project turned out:


Here are some close ups of the different pieces to the project:


You actually make the pompoms, and I took a photo of 3 in progress pompoms so you could see the transformation:


It takes a bit of fussing with the twine fibers and trimming to get them looking just right!

Something else I learned while creating the kit is that it takes a while for the Craft White to dry on the Chalkboard Paper (although it stamps beautifully on there . . . I will be getting more Chalkboard paper!!!)  Maybe heat setting the ink would help?  

Even though I used more photos than on the sample shown in the Occasions Catalog, I was pleased to have lots of pieces left over from the kit . . . they'll be fun to use to make some cards!

Supplies used on this project:


Thanks so much for visiting!

- Michelle

Friday, January 16, 2015

Flashback Friday: Many Merry Stars

Happy Friday!  Hope you are having a great day!  I have a Flashback Friday post for you today . . . with some Christmas projects, which actually I only recently finished!  (Ran out of time before Christmas, but now I'm ahead for this year.  Whoo Hoo! ;)  ) 
 
These are some open-topped goodies boxes I made with the Many Merry Stars kit and stamp set (just didn't use the full panel to create the sides . . . I cut off four sections to leave the top open):
 

Here is the largest star:


I decorated the outside as shown in the kit, but cut apart the side pieces so that the box opens and closes:


I used a similar technique for this one:


Here are the adorable smallest stars from the kit:


And, many more stars:


Such a fun kit!!!  And, actually, it turns out that the Many Merry Stars kit and stamp set that I used for these projects is still available in the Clearance Rack (while supplies last), so if you want to create your own of these, be sure to head over there and pick them up!  Okay, onto the projects!

Thanks so much for stopping by!

- Michelle