Monday, February 29, 2016

Stained Glass Rose Birthday Card

For my mom's birthday a couple weeks back, I knew I wanted to create a special card with the Rose Wonder bundle.  My amazingly talented friend Marlene and I had just been swapping, and she'd sent me a card inspired by Dena Rekow, who has a wealth of inspiring projects and techniques on her blog, www.thecreativitycave.com!  After seeing Dena's Stained Glass Technique post and video, I decided to give that a try.  Here's how my card turned out:


I used a Sahara Sand card base, then a layer of Basic Black, topped with the beautiful rose pattern from the Timeless Elegance Designer Paper, as well as a lace pattern (peeking through at the bottom).  I sponged Rose Red and Pear Pizzazz onto the roses and leaves on the designer paper.  I tied some Sahara Sand Lace Trim around the card.  The outline for the rose is cut from a Gold Foil sheet, and I filled in the rose with Real Red, Cherry Cobbler, and Rose Red.  The leaves are filled with Pear Pizzazz and Always Artichoke.

It takes a while to place the pieces back into the outline, but I think the end result is really worth it!!  Looking forward to trying this again with some other color combinations.  Hope you are inspired to try it, too!

Thanks for visiting my blog!

- Michelle
Sunday, February 28, 2016

Hoppy Little Baby Card and Tags

Hi everyone!  Hope you are having a great weekend!  

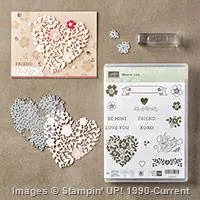
Popping in to share a baby card and tags I made for a dear friend who just had another sweet little girl.   I've been wanting to use the Made with Love stamp set for a while, and this was the perfect opportunity!  I chose the cute little bunny because it actually coordinated with my gift.  Here's how the card turned out:


I decided that the bunny didn't look happy enough, though, so used my Black Stampin' Write Marker to give her  bigger grin:


There is a subtle stamped background on the Blushing Bride layer -- I stamped words and flowers from the Made with Love set in Blushing Bride to create that.  The strip of designer paper is from the Birthday Bouquet Designer Series Paper.  And, the flowers are made with the Petite Petals Bundle (stamped in Hello Honey), except for the smallest, which is made with the Circle of Spring Stamp Set, and die cut with the Wonderful Wreath Framelits.

The bunny's tag shaped background and Mossy Meadow tag layer beneath that were die cut with the Tags & Labels Framelits Dies.

I couldn't resist stamping the back with images from the Made with Love set, too:


And, here's the inside:


Here are little coordinating tags I created using the Tag a Bag Accessory Kit to go on the gifts I sent with the card (apologies for the bad lighting in the photo!):


I'm thinking it would be fun to use that bunny to create some cute cards for Spring and Easter as well.  How about you?

Thanks so much for visiting my blog!

- Michelle

Friday, February 26, 2016

Lace and Blooms Sympathy Cards

TGIF!  Hope you are having a great day!  It's been busy here, with some stamping during Paper Pumpkin Power Hour, yearbook work, and more!  Still, had a few minutes and wanted to pop in and share some special cards I created recently.  These came out of my experimenting with combining the Acrylic Smash Technique with stamping with embossing folders, and in this case, I used the Lovely Lace Textured Impressions Embossing Folder:


The greeting and die cut flowers in the background were created with the Rose Wonder Bundle, and the Soft Sky five petal flowers were created with the Botanical Blooms bundle.  Ink colors used were Bermuda Bay, Soft Sky, Lost Lagoon, Old Olive, and Pear Pizzazz.

Thanks so much for visiting my blog!

- Michelle

Tuesday, February 23, 2016

Tea-riffic!

Hi!  Yesterday, I finished watching the next-to-last episode of Downton Abbey, and I'm sad to think there's only one more episode to go!  So, in honor of that, it seemed appropriate to share a tea cup card!  

Here it is:


The card base is Soft Sky, with another layer of Soft Sky on top of that, which is embossed with the Elegant Dots Textured Impressions Folder.  The tea cup and greeting are from the Nice Cuppa stamp set.  The heart-shaped steam and tea cup were cut out using the Cups & Kettles Framelits dies.  (Nice Cuppa and the Cups & Kettles Framelits dies are available as a bundle here (for a savings of 15% off!)  I stamped the tea cup in So Saffron, and added the flowers (in shades of Melon Mambo, stamped off) and leaves (Cucumber Crush) from the Number of Years stamp set.  Here's a close up so you can see that a bit better:


Hard to see in the photo, but I also added a bit of Wink of Stella to the flower centers and cup details, so it sparkles!

The "tablecloth" is vellum from the Sale-a-Bration Botanical Gardens Vellum Stack.  The tea bag is cut from a piece of Pink Pirouette card stock, and I used one of the mini staples to attach a bit of White Baker's Twine to it.

Hmm, all this talk about tea makes me want to grab a cuppa right now . . . how about you?  Will you join me?

Thanks for stopping by!

- Michelle

Saturday, February 20, 2016

Happy Birthday Love Bug

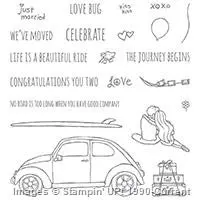
Happy Saturday!!  A quick post today to share a fun card I made recently, using the Sunburst Bundle and Beautiful Ride stamp set, along with the Balloon Celebration stamp set.  I love how these different sets work together!!! 

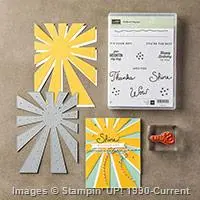
This first picture is of the card in progress.  At this point, I have the Crumb Cake card base, a layer of Calypso Coral and slightly smaller layer of Whisper White, on which I've stamped clouds from Balloon Celebration using Pool Party ink.  I rounded the corners of those two layers using the Project Life Corner Rounder Punch.  Then, on top of that is the layer of So Saffron, which I die cut with the Sunburst Die and stamped the rays with the dotted line image from the coordinating stamp set using Calypso Coral ink (and Gold Wink of Stella, though you can't see that in the photo).  There's a circle of Gold Glimmer Paper, topped with a smaller circle of So Saffron with the greeting from Sunburst Sayings, stamped in Calypso Coral.  I think I could have stopped here and had a cute birthday card --  what do you think?  


\

But, of course, I didn't stop there!  I added the Bug from Beautiful Ride (stamped with Tuxedo Black onto Soft Sky, then the wheels with markers, added a mini brad in the center, and colored the windows with White Gel Pen and Clear Wink of Stella, then topped with a layer of Fine Tip Glue).  I used White Baker's Twine to add a bow and gel pen for strings to tie the balloons (in Wisteria Wonder, Pear Pizzazz, and Calypso Coral, with a touch of white gel pen to create a highlight and a layer of Fine Tip Glue to make them shine) to the car, and voila:


Here's the finished inside of the card (although not yet glued into the card base in this picture!  oops!).  The images are from Balloon Celebration, except for the dotted line, which is from Sunburst Sayings:


Thanks so much for visiting my blog!

- Michelle

Thursday, February 18, 2016

Botanical Bloom Heart Card

Happy Thursday!  Popping in quickly to share this card with you:


I used a heart die cut (from the retired Heart Framelits) as a base, then glued flowers on top.  The flowers are cut with the new Botanical Builder Framelits Dies, from card stock that I had dyed for this project.  I added a Rhinestone Jewel in the center of each flower.  The "FRIEND" greeting is from the Bloomin' Love Photopolymer Stamp Set, and is stamped in Melon Mambo.  The card base is Crisp Cantaloupe (retired) and the next layer is Strawberry Slush (also retired), and the layer underneath the flower heart is Whisper White (thankfully, still available! ;) ).

I think this could be a fun card for a wedding as well, with a change of greeting, and maybe a change of color scheme as well . . .

Thanks for stopping by!

- Michelle

Wednesday, February 17, 2016

Paper Pumpkin Cute Conversations Projects

Hi!  A few more Valentine's to share today!  These are projects I created using the January 2016 Paper Pumpkin kit -- Cute Conversations. 

First, a few treat bags, which I dressed up with stamps and embellishments from the kit, plus some flowers I punched out of the leftover paper from the kit, using the Petite Petals Punch and flower from the Itty Bitty Accents Punch Pack:

\

Then, inspired by cards I'd seen on Pinterest and the Facebook Paper Pumpkin Fan Club group, I used pieces from the kit, plus Botanical Builder flowers, and either card stock or Wildflower Fields Designer Series Paper backgrounds to create these cards:


If you aren't already a Paper Pumpkin subscriber and would like to learn more or sign up, be sure to click here to go to my Paper Pumpkin website!  And, don't forget that during Sale-a-Bration, there is a special on the 3-month subscription -- it's only $55, plus you get to choose a free Sale-a-Bration item!!!

Thanks so much for visiting my blog!


- Michelle 

Tuesday, February 16, 2016

Valentine's for My Sweeties

Happy Tuesday!  I'm still trying to catch up on sharing my Valentine's projects!  Here are some cards I created for my boys.  I happened to have two kits left from my Spirit Night projects (you can see the original design here), and put those together into special cards for my boys:


Then, I wanted to use the Beautiful Ride set to make a special card for Greg, and here's how that turned out:


I sponged the background, and colored the bug and couple with my Blendabilities.  Fairly clean and simple, but was pleased with how it turned out!

The big news from Stampin' Up! today is that there are three new items available for Sale-a-Bration! You can see those here.  Which is your favorite?  I love the Metallic Glitter Tape and can't wait to play with that, but also think both stamp sets are wonderful, too!!!  Want them all!!!  How about you?

Thanks so much for visiting!

- Michelle

Supply List
Built for Free Using: My Stampin Blog

Monday, February 15, 2016

Lots of Happy Hearts -- Acrylic Smash Technique Cards

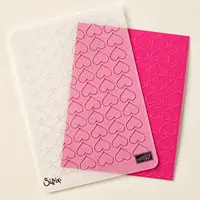
Recently, I was inspired to try out the Acrylic Smash technique (in a nutshell, squish ink pads onto a piece of acrylic, spritz with a little bit of water, then smash onto your card stock).  I also decided to try using embossing folders as my acrylic piece.  Here's the photographic evidence of the results of my experiments:


With the pieces created using the Happy Hearts embossing folder, I decided to create some Valentine's cards to send to friends.  (You might recognize this first layout from the cards I created for the Spirit Night in this post):


Which of these cards is your favorite?

Thanks for visiting my blog!

- Michelle

Supply List
Built for Free Using: My Stampin Blog